You’re here because you love kuromi, right? That punk-meets-cute Sanrio style is just too cool. This guide is all about helping you draw her perfectly.
I promise, by the end, you’ll not only have a finished drawing but also a solid understanding of her core shapes for future art.
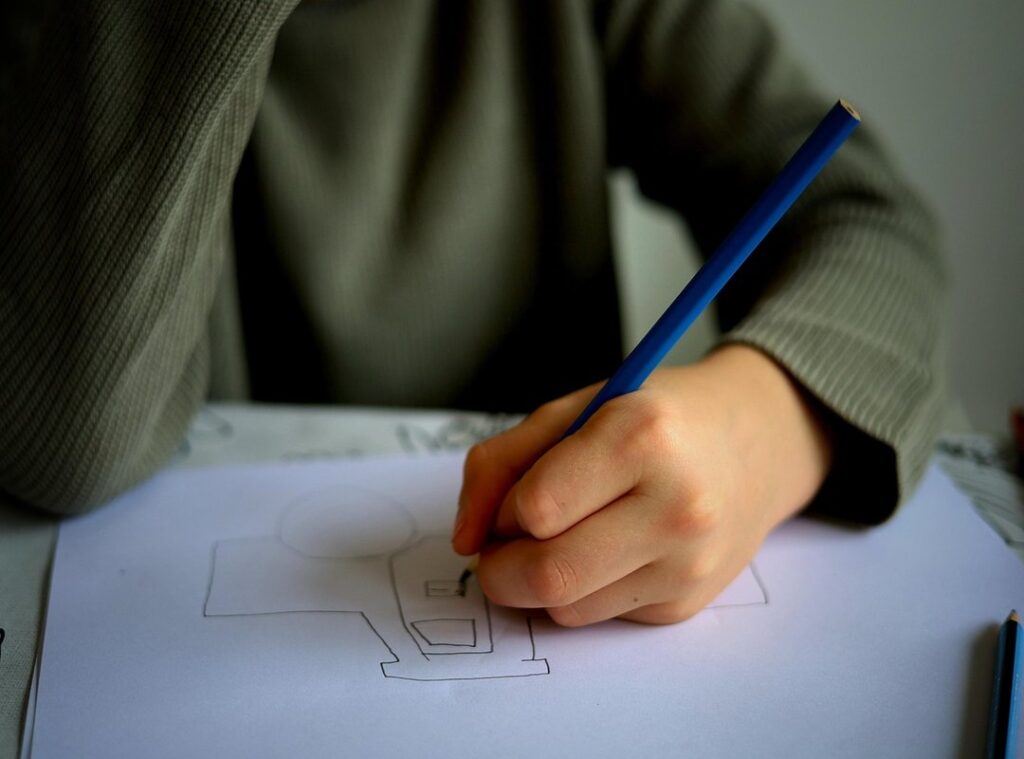
The jester hat and expressive face can be tricky. But don’t worry, this step-by-step tutorial makes them easy to handle. Let’s dive in and have some fun with it.
Gathering Your Essential Art Supplies
When you’re starting out with sketching, having the right tools can make all the difference. Let’s break it down.
- Pencils: A standard HB pencil for light guidelines, and a 2B or 4B pencil for darker final lines.
- Eraser: A quality eraser, like a kneaded eraser, that won’t smudge your work.
Choosing the right paper is crucial too. A simple sketchbook works well for everyday practice. For a cleaner finish, go for smooth Bristol board.
If you’re into inking and coloring, consider these:
- Fine-liner pens: Various thicknesses (e.g., 0.3mm, 0.5mm) for crisp outlines.
- Coloring mediums: Colored pencils, alcohol markers, or digital apps like Procreate or Clip Studio Paint.
Pro tip: Always start with very light pressure on your pencil. Initial guidelines are meant to be erased later, so keep them faint.
Having the right tools prepared beforehand makes the drawing process smoother and more enjoyable. Trust me, it’s worth the effort.
In fact, a study by the Journal of Art & Design Education found that students who used high-quality materials were more engaged and produced better artwork. So, don’t skimp on the basics.
Kuromi tekenen, anyone?
Breaking Down Kuromi’s Core Shapes and Features
Let’s talk about Kuromi’s head shape. It’s not a perfect circle but a rounded, slightly wide shape. This is typical of Sanrio characters, giving them that cute, approachable look.
Her most iconic feature, and the jester-style hat. It’s a cap with two long, floppy points (or ‘ears’) and a distinct collar.
This hat sets her apart and adds to her playful, mischievous vibe.
The skull logo on her hat is simple yet striking. It’s a circle with two small ovals for eyes and a crossbones design. This detail is key to her rebellious, edgy aesthetic.
Her facial features are just as important. Her eyes are simple ovals, often with a small white dot for a highlight. This shows her mischievous nature.
Her nose is a tiny dot, and her mouth is usually a small, confident smirk. These little details make her expression come alive.
Kuromi’s body proportions follow the ‘chibi’ style. This means her body is small and simple compared to her large head. It makes it easier for beginners to draw.
Pro tip: Start with the head and work your way down for a balanced look.
Don’t forget her devil-like tail. It’s a key detail that completes her rebellious look. This tail adds a touch of mischief and fun to her overall design.
If you’re into kuromi tekenen, these details will help you nail her look. Just remember, it’s all about those little touches that bring her personality to life.
Step-by-Step: Drawing Kuromi’s Head and Face
Drawing Kuromi’s head and face can be a fun and rewarding experience. Let’s break it down into simple steps. kuromi tekenen
Start by lightly sketching a large, rounded rectangle for the basic head shape. Add a vertical and horizontal guideline through the center to help place her features accurately.
Next, draw the main part of the jester hat sitting on top of the head. Then, sketch the two long, floppy points extending outwards and downwards from the sides of the hat.
Using the center of the hat as a guide, draw the skull logo. Start with a circle, then add the simple eyes and crossbones.
Using your facial guidelines, place her eyes on the horizontal line. Draw two ovals, ensuring they are evenly spaced. Add her tiny nose and smirk below.
Add the jester collar around the base of her head. This is a series of rounded, triangular points.
Carefully refine the lines of the head, face, and hat, erasing the initial guidelines as you go to clean up the drawing.
Pro tip: Practice makes perfect. Try drawing kuromi tekenen several times to get a feel for the proportions and details. You’ll see improvement with each attempt.
Step-by-Step: Sketching Kuromi’s Body and Outfit

Step 1: Directly below the jester collar, sketch a small, simple torso. Keep it short and slightly rounded to maintain her cute, chibi proportions.
Step 2: Draw her arms and hands, and they are typically simple, tube-like shapes. You can pose them on her hips for a classic sassy look or have one arm waving.
Step 3: Add her short, stubby legs and feet. These can be drawn as simple oval shapes extending from the bottom of her torso.
Step 4: Don’t forget her tail! Sketch a thin, pointed, devil-like tail emerging from her lower back area.
Step 5: Review the entire drawing, ensuring all proportions look correct. This is the last chance to make adjustments before inking.
Step 6: Once you are happy with the pencil sketch, carefully trace over your final lines with a fine-liner pen for a bold, clean look.
Pro Tip: Take your time with each step. The more attention you pay to details, the better your kuromi tekenen will turn out.
Following these steps will help you create a charming and accurate depiction of Kuromi. It’s all about getting those little details right, which makes the final result so rewarding.
Bringing Your Kuromi Drawing to Life with Color
Kuromi’s hat and body are typically black or dark grey, while the skull and her collar accents are pink. kuromi tekenen can be a delightful experience once you add these colors.
Add a slightly darker grey or black in areas under the hat’s brim and below her head to create depth. This simple shading tip will make your drawing more dynamic.
Feel free to experiment with different expressions or poses now that you understand her basic construction. Each new attempt is a step towards mastering your craft.
Practice is the key to improving, and you should be proud of your creation. Every artist starts somewhere, and every sketch brings you closer to perfection.
Why not try drawing Kuromi’s rival, My Melody, next? It’s a great way to expand your skills and have even more fun!
 Gaming Rig Optimization & Tech Innovation Specialist
There is a specific skill involved in explaining something clearly — one that is completely separate from actually knowing the subject. Joana Dillardoniel has both. They has spent years working with tech-powered gaming innovations in a hands-on capacity, and an equal amount of time figuring out how to translate that experience into writing that people with different backgrounds can actually absorb and use.
Joana tends to approach complex subjects — Tech-Powered Gaming Innovations, Expert Tutorials, World-Class eSports Frameworks being good examples — by starting with what the reader already knows, then building outward from there rather than dropping them in the deep end. It sounds like a small thing. In practice it makes a significant difference in whether someone finishes the article or abandons it halfway through. They is also good at knowing when to stop — a surprisingly underrated skill. Some writers bury useful information under so many caveats and qualifications that the point disappears. Joana knows where the point is and gets there without too many detours.
The practical effect of all this is that people who read Joana's work tend to come away actually capable of doing something with it. Not just vaguely informed — actually capable. For a writer working in tech-powered gaming innovations, that is probably the best possible outcome, and it's the standard Joana holds they's own work to.
Gaming Rig Optimization & Tech Innovation Specialist
There is a specific skill involved in explaining something clearly — one that is completely separate from actually knowing the subject. Joana Dillardoniel has both. They has spent years working with tech-powered gaming innovations in a hands-on capacity, and an equal amount of time figuring out how to translate that experience into writing that people with different backgrounds can actually absorb and use.
Joana tends to approach complex subjects — Tech-Powered Gaming Innovations, Expert Tutorials, World-Class eSports Frameworks being good examples — by starting with what the reader already knows, then building outward from there rather than dropping them in the deep end. It sounds like a small thing. In practice it makes a significant difference in whether someone finishes the article or abandons it halfway through. They is also good at knowing when to stop — a surprisingly underrated skill. Some writers bury useful information under so many caveats and qualifications that the point disappears. Joana knows where the point is and gets there without too many detours.
The practical effect of all this is that people who read Joana's work tend to come away actually capable of doing something with it. Not just vaguely informed — actually capable. For a writer working in tech-powered gaming innovations, that is probably the best possible outcome, and it's the standard Joana holds they's own work to.